Sustainable Cooking
Roll sushi -How to Make Alaska Roll Sushi

Roll Sushi is one of the most beloved dishes in the world, combining delicate flavors, fresh ingredients, and a skillful balance of textures. Among the many sushi rolls available, the Alaska Roll Sushi stands out with its delicious combination of salmon, avocado, and a touch of smoked salmon. This roll is not only tasty but also visually appealing, making it the perfect dish to serve at home or a sushi party. If you’re wondering how to make Alaska Roll Sushi, this guide will take you step by step through the process, provide helpful tips, and explain the ingredients in detail.
What Is an Alaska Roll Sushi?
Before we dive into the recipe, let’s first take a closer look at what makes an Alaska Roll Sushi so unique. This roll is often made with fresh salmon, smoked salmon, and avocado, wrapped in nori (seaweed) and seasoned sushi rice. The combination of these ingredients gives the roll a delightful balance of flavors: creamy avocado, tender fish, and the umami of the nori. While variations of the Alaska Roll exist (some include cream cheese, spicy mayo, or cucumber), the basic ingredients are what define this popular sushi choice.
Essential Ingredients for Alaska Roll Sushi
To make an authentic Alaska Roll Sushi, you’ll need the following ingredients:
- Fresh Salmon (Sashimi-Grade)
Fresh, sashimi-grade salmon is the star of this sushi roll. Make sure to purchase salmon that is marked as sashimi-grade from a reputable fishmonger. Sashimi-grade fish is of the highest quality and safe to eat raw.
- Smoked Salmon
The smoked salmon used in the Alaska Roll adds a savory, rich, and slightly smoky flavor, complementing the fresh salmon. It also provides a contrast in texture and taste, making the roll more complex.
- Avocado
Avocado is a key component in the Alaska Roll, offering a creamy, buttery texture that balances the flavors of the fish. It also adds a fresh element that pairs perfectly with the salmon.
- Sushi Rice
The sushi rice should be sticky, slightly sweet, and tangy. To make this, use short-grain sushi rice seasoned with rice vinegar, sugar, and salt. The vinegar gives the rice its signature flavor and helps it stick together in the roll.
- Nori (Seaweed)
Nori, or seaweed, is essential for wrapping sushi rolls. You can find sheets of nori at most Asian grocery stores. Make sure to buy roasted nori, which has the right texture for sushi rolls.
- Cucumber (Optional)
Many versions of the Alaska Roll include thinly sliced cucumber for a refreshing crunch that contrasts nicely with the creamy avocado and tender fish.
- Soy Sauce, Wasabi, and Pickled Ginger (For Dipping)
For a traditional sushi experience, serve your Alaska Roll with soy sauce, wasabi, and pickled ginger on the side. The soy sauce adds saltiness, wasabi provides a spicy kick, and the ginger cleanses your palate between bites.
Tools You’ll Need for Making Alaska Roll Sushi
Before we jump into the steps, here are some tools you’ll need to prepare your sushi:
- Bamboo Sushi Mat: This mat is essential for rolling the sushi evenly and tightly.
- Sharp Knife: A sharp, non-serrated knife is important for cutting the sushi roll into clean, bite-sized pieces without crushing it.
- Rice Paddle or Spoon: This tool helps you handle the sticky sushi rice without damaging it.
- Small Bowl of Water: Use this to wet your hands to prevent the rice from sticking.
Step-by-Step Guide: How to Make Alaska Roll Sushi
Now that you have your ingredients and tools, it’s time to get started. Follow these simple steps to create your own Alaska Roll Sushi at home.

Step 1: Prepare the Sushi Rice
- Rinse the rice: Wash the sushi rice under cold water until the water runs clear. This removes excess starch and ensures the rice will stick together.
- Cook the rice: Use a rice cooker or stovetop method to cook the rice. The ratio should be about 1 cup of rice to 1 1/4 cups of water. Once cooked, let it sit for 10 minutes to steam and firm up.
- Season the rice: In a small saucepan, combine 1/4 cup of rice vinegar, 2 tablespoons of sugar, and 1 tablespoon of salt. Heat until the sugar dissolves, but do not boil. Pour this vinegar mixture over the rice, stirring gently to mix. Let the rice cool to room temperature.
Step 2: Prepare the Fish and Vegetables
- Slice the fresh salmon: Use a sharp knife to slice your sashimi-grade salmon into thin strips, about 1/4 inch thick.
- Slice the smoked salmon: Cut the smoked salmon into long strips similar in size to the fresh salmon.
- Prepare the avocado: Slice the avocado in half, remove the pit, and cut the flesh into thin slices.
- Slice the cucumber (if using): Peel and cut the cucumber into thin strips.
Step 3: Assemble the Roll
- Lay out your nori sheet: Place a bamboo sushi mat on a flat surface and lay a sheet of nori on top with the shiny side down.
- Spread the rice: Wet your hands with water to prevent the rice from sticking. Take a small amount of sushi rice and spread it evenly over the nori, leaving about 1 inch of space at the top for sealing.
- Add the fillings: Arrange the fresh salmon, smoked salmon, avocado, and cucumber (if using) in the center of the rice. Make sure to place the ingredients in a line across the middle of the rice.
- Roll the sushi: Begin rolling the sushi from the bottom using the bamboo mat. Apply gentle pressure to keep the roll tight. When you reach the exposed edge of the nori, wet it with a little water to seal the roll.
Step 4: Slice the Roll
- Cut the roll: Using a sharp knife, slice the roll into 6-8 pieces. Clean the knife between cuts to ensure neat slices.
- Serve and enjoy: Place the pieces on a plate and serve with soy sauce, wasabi, and pickled ginger on the side.
Tips for Perfecting Your Alaska Roll Sushi
- Use fresh ingredients: Since sushi relies heavily on fresh ingredients, make sure you use the best quality fish and vegetables available.
- Don’t overfill the roll: It can be tempting to stuff the roll with lots of ingredients, but keep it simple. Too many ingredients can make the roll difficult to cut and affect the balance of flavors.
- Practice your rolling technique: Rolling sushi takes practice. Don’t be discouraged if your first rolls aren’t perfect—keep trying until you get the hang of it.
- Serve immediately. Sushi is best served fresh. If you wait too long, the nori may become soggy, and the flavors will be less vibrant.
Variations of the Alaska Roll
While the classic Alaska Roll features raw and smoked salmon, there are several variations you can try:
- Baked Alaska Roll: After assembling the roll, you can bake it lightly, either in the oven or with a torch, for a warm, crispy finish.
- Tempura Alaska Roll: Some of the ingredients, such as avocado or salmon, are tempura-fried to give the roll an extra crunchy texture.
- Spicy Alaska Roll: For a fiery kick, add a little spicy mayo (mayonnaise mixed with Sriracha) to the roll.
Why You Should Make Alaska Roll Sushi at Home
Making sushi at home has several benefits:
- You have complete control over the ingredients, so you can ensure the quality is top-notch.
- It’s a fun and interactive activity for friends or family.
- It’s a more affordable option than dining out at a sushi restaurant.
You can customize the roll to your taste and even experiment with different ingredients and flavors.
FAQs: How to Make Alaska Roll Sushi
- What is an Alaska Roll Sushi made of?
- The classic Alaska Roll typically includes fresh salmon, smoked salmon, avocado, sushi rice, and nori (seaweed), with optional cucumber for added crunch.
- Is Alaska Roll Sushi cooked or raw?
- The Alaska Roll usually contains both raw and smoked salmon, so it’s partially raw. However, you can make a fully cooked version by substituting the fresh salmon with baked or grilled salmon.
- Can I use other types of fish in an Alaska Roll?
- While salmon is traditional, you can substitute other fish like tuna, yellowtail, or even crab for a unique variation on the roll.
- How do I know if my salmon is sashimi-grade?
- Look for “sashimi-grade” or “sushi-grade” labels when purchasing salmon. Always buy from a reputable supplier, and ask if the fish has been frozen to kill any potential parasites.
- Can I make Alaska Roll Sushi without a bamboo mat?
- Yes, you can roll sushi without a mat by using plastic wrap or a kitchen towel, though a bamboo mat provides the best control for rolling tightly.
- How do I prevent my sushi rice from sticking to my hands?
- Wet your hands with water or a touch of rice vinegar before handling the rice. This will keep it from sticking and make it easier to spread.
- What’s the best way to slice the Alaska Roll without it falling apart?
- Use a very sharp, non-serrated knife and wet it between each cut to prevent sticking. A smooth sawing motion will help create clean slices.
- How many calories are in an Alaska Roll Sushi?
- A typical Alaska Roll has approximately 300-400 calories, depending on the ingredients and portion size.
- Can I make Alaska Roll Sushi vegan?
- Yes, you can substitute fish with plant-based options like marinated tomatoes, smoked carrots, or tofu, along with avocado and cucumber for a vegan version.
- How should I store leftover Alaska Roll Sushi?
- Sushi is best eaten fresh, but if you need to store leftovers, wrap them tightly in plastic wrap and refrigerate for up to 24 hours.
- What are the best dipping sauces for Alaska Roll Sushi?
- Traditional soy sauce is common, but you can also try spicy mayo, ponzu sauce, or a hint of wasabi mixed into soy sauce for added flavor.
Conclusion
Now that you know how to make Alaska Roll Sushi, it’s time to roll up your sleeves and get cooking. Whether you’re a sushi beginner or an experienced home cook, this roll is a fun and delicious way to enjoy sushi at home. By following the steps in this guide, you’ll be able to create beautiful, flavorful Alaska Rolls that are perfect for any occasion. So gather your ingredients, get your sushi mat ready, and start making your very own Alaska Roll Sushi today!
Sustainable Cooking
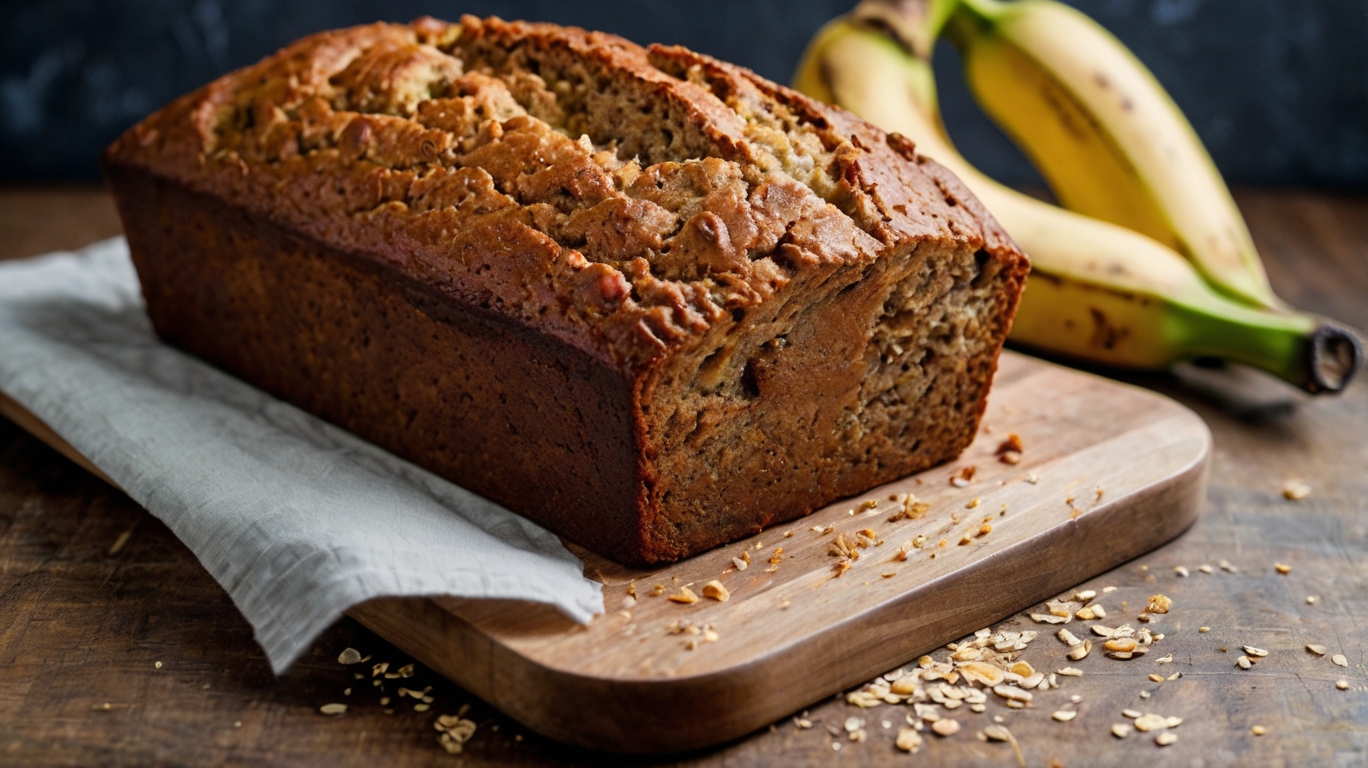
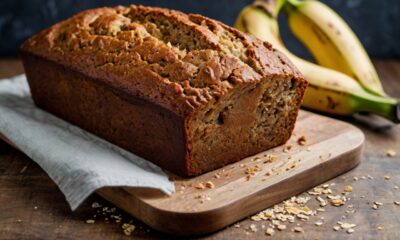
Moist Banana Bread Recipe with Oil and Brown Sugar The Perfect Treat
Key Takeaways for Success
- Banana Ripeness is Key – The spottier, the better
- Oil > Butter for moisture retention
- Brown Sugar adds flavor and softness
- Gentle Mixing prevents toughness
- Proper Cooling prevents crumbling
- Storage Matters – Wrap tightly to maintain freshness
Introduction: The Perfect Banana Bread
There’s something magical about pulling a golden loaf of banana bread from the oven. This ultimate moist banana bread recipe with oil and brown sugar delivers perfection every time – a tender crumb, rich caramelized flavor, and incredible moisture that lasts for days. Unlike traditional butter-based recipes, this version uses oil for superior texture and brown sugar for depth of flavor. Whether you’re a beginner baker or a seasoned pro, this foolproof recipe will become your new standard. Let’s explore why this banana bread stands above the rest and how to make it perfectly every time.
The Science Behind the Moisture
What makes this banana bread so exceptionally moist? The answer lies in the chemistry of our key ingredients. Vegetable oil coats flour proteins more thoroughly than butter, preventing gluten overdevelopment that leads to dryness. Meanwhile, brown sugar’s molasses content attracts and retains moisture far better than white sugar. When combined with the natural moisture from ripe bananas, this creates the perfect environment for ultra-tender bread that stays fresh longer.
Choosing the Right Bananas
The secret weapon in any great banana bread? Overripe bananas with plenty of brown spots. These bananas are sweeter (as starches convert to sugars) and mash more easily into a smooth puree. For best results, use bananas that are so ripe you’d normally consider throwing them away. No ripe bananas? Speed up the process by baking unpeeled bananas at 300°F for 15-20 minutes until their skins blacken.
Oil vs Butter: Why Oil Wins
While butter adds delicious flavor, oil reigns supreme for moisture retention. Butter contains about 15% water that evaporates during baking, while oil is 100% fat. This means oil-based banana bread stays moist for days rather than drying out. For the best of both worlds, use a neutral oil like vegetable or canola, or try coconut oil for a subtle tropical note. The result? Bread that stays tender from the first slice to the last.
The Magic of Brown Sugar
Brown sugar does double duty in this recipe. Its molasses content not only adds rich caramel notes but also attracts moisture from the air (hygroscopic properties), keeping your bread soft. The slight acidity in brown sugar also helps tenderize gluten strands. For deeper flavor, try dark brown sugar, or mix half brown and half white sugar for a lighter taste. Either way, you’ll get superior moisture compared to using white sugar alone.

Why This Recipe Works: The Science of Moisture
Understanding the science behind this recipe ensures consistent results:
- Oil vs. Butter: Vegetable oil (or coconut oil) creates a more tender crumb because:
- 100% fat content (butter contains 15% water)
- Coats flour proteins more thoroughly
- Prevents gluten overdevelopment
- Extends freshness
- Brown Sugar Benefits:
- Molasses content attracts and retains moisture
- Natural acidity tenderizes gluten
- Caramel notes enhance flavor complexity
- Creates a beautiful golden crust
- Banana Ripeness:
- Overripe bananas have converted starches to sugars
- Easier to mash into a smooth puree
- Provide natural sweetness and moisture
Ingredients & Their Roles
Wet Ingredients:
- 3 very ripe bananas (about 1 ½ cups mashed) – The star ingredient providing moisture, sweetness, and flavor
- ½ cup vegetable oil – Creates tender texture (can substitute melted coconut oil)
- ¾ cup packed brown sugar – For moisture retention and caramel notes
- 2 large eggs – Bind ingredients and add structure
- 1 tsp vanilla extract – Enhances overall flavor
Dry Ingredients:
- 1 ½ cups all-purpose flour – The structural base
- 1 tsp baking soda – Leavening agent (not baking powder)
- ½ tsp salt – Balances sweetness and enhances flavor
- ½ tsp cinnamon (optional) – Warm spice note
Step-by-Step Instructions with Pro Tips
1. Preparing the Pan
- Grease a 9×5 inch loaf pan thoroughly
- Line with parchment paper with overhang for easy removal
- Pro Tip: Dust greased pan with flour for extra non-stick insurance
2. Mashing the Bananas
- Peel bananas and place in large mixing bowl
- Mash with a fork or potato masher until smooth with some small lumps
- Pro Tip: For extra creamy texture, blend bananas briefly
3. Mixing Wet Ingredients
- Add oil to mashed bananas and whisk to combine
- Whisk in brown sugar until fully dissolved
- Beat in eggs one at a time
- Stir in vanilla extract
- Pro Tip: Room temperature ingredients incorporate better
4. Combining Dry Ingredients
- In separate bowl, sift together flour, baking soda, salt, and cinnamon
- Pro Tip: Sifting prevents lumps and aerates the flour
5. Bringing It All Together
- Add dry ingredients to wet ingredients
- Fold gently with rubber spatula until just combined
- Critical Tip: Overmixing develops gluten, leading to tough bread
6. Baking to Perfection
- Pour batter into prepared pan
- Bake at 350°F (175°C) for 50-60 minutes
- Test doneness with toothpick (should come out with moist crumbs)
- Pro Tip: Rotate pan halfway for even baking
7. Cooling Properly
- Let cool in pan for 10 minutes
- Transfer to wire rack to cool completely (about 1 hour)
- Important: Cutting too soon causes crumbling
Expert Troubleshooting Guide
Problem: Bread is dense/gummy
Solution:
- Check baking soda freshness
- Ensure proper measuring (don’t pack flour)
- Bake 5-10 minutes longer
Problem: Bread cracks on top
Solution:
- This is normal! Sign of proper rise
- Can reduce oven temp to 325°F for more even bake
Problem: Edges get too dark
Solution:
- Use light-colored metal pan
- Tent with foil last 15 minutes
Next-Level Variations
Mix-In Ideas:
- Classic Walnut: ½ cup chopped walnuts
- Double Chocolate: ½ cup chocolate chips + 2 tbsp cocoa powder
- Tropical: ⅓ cup shredded coconut + ¼ cup diced dried pineapple
- Protein Packed: ¼ cup vanilla protein powder (reduce flour by 2 tbsp)
Dietary Adaptations:
- Gluten-Free: 1:1 gluten-free flour blend
- Vegan: Flax eggs (2 tbsp ground flax + 6 tbsp water)
- Lower Sugar: Reduce brown sugar to ½ cup
- Whole Grain: Substitute half flour with whole wheat
Storage & Serving Suggestions
Keeping It Fresh:
- Room Temperature: Wrapped tightly, lasts 3 days
- Refrigerated: Up to 1 week (bring to room temp before serving)
- Freezing: Slice and wrap portions; freeze up to 3 months
Serving Ideas:
- Toasted with butter or cream cheese
- French toast style (dip slices in egg mixture and pan-fry)
- Bread pudding base
- Ice cream sandwich with vanilla ice cream
Frequently Asked Questions
Q: Can I use melted butter instead of oil?
A: Yes, but the bread will be slightly less moist and dry out faster. Reduce salt to ¼ tsp if using salted butter.
Q: My bananas aren’t ripe enough – help!
A: Bake unpeeled bananas at 300°F for 15-20 minutes until skins blacken, or microwave for 30-second intervals until soft.
Q: Can I make this in muffin form?
A: Absolutely! Bake at 375°F for 18-22 minutes. Makes 12 standard muffins.
Q: Why did my bread sink after removing from oven?
A: Likely underbaked. Next time test with toothpick – it should come out with moist crumbs but no wet batter.
Conclusion: Your New Go-To Recipe
This moist banana bread recipe with oil and brown sugar represents the perfect balance of simplicity and perfection. By understanding the why behind each ingredient and step, you’re equipped to make flawless banana bread every time. The oil ensures long-lasting tenderness, while the brown sugar contributes both flavor and moisture. Whether you enjoy it plain, toasted, or dressed up with your favorite additions, this recipe delivers consistent, delicious results. Keep this recipe handy – it’s sure to become a family favorite that you’ll make again and again. Happy baking!
Sustainable Cooking
Big Mac Sauce: Secrets, Ingredients and How to Make It at Home
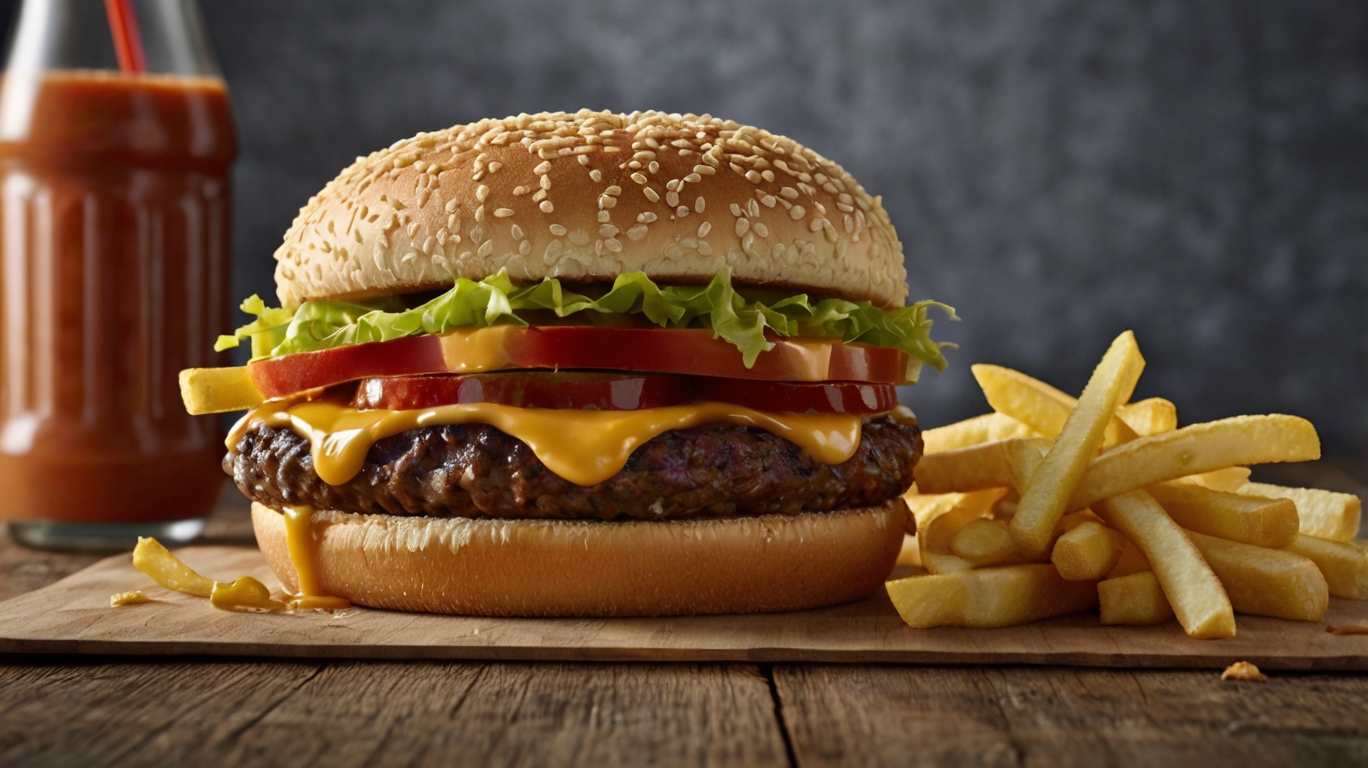
The Big Mac Sauce is the heart and soul of McDonald’s iconic Big Mac burger. Its creamy, tangy, and slightly sweet flavor has made it a global favorite. But what exactly is in this famous sauce? Can you find something similar in stores? And how can you recreate the Big Mac experience at home? Let’s dive into everything you need to know about Big Mac Sauce.
1. What is in a Big Mac Sauce?
The exact recipe for Big Mac Sauce is a closely guarded secret, but over the years, food enthusiasts and experts have cracked the code. The sauce is a creamy, tangy blend of the following key ingredients:
- Mayonnaise (the base)
- Sweet pickle relish
- Yellow mustard
- Vinegar
- Garlic powder
- Onion powder
- Paprika
- A touch of sugar or honey for sweetness
These ingredients combine to create the signature flavor that pairs perfectly with the beef patties, lettuce, cheese, pickles, and onions in a Big Mac.
2. What is the closest sauce to Big Mac Sauce?
If you’re looking for a store-bought alternative, Thousand Island dressing is the closest match to Big Mac Sauce. It has a similar creamy texture and tangy-sweet flavor profile. However, it’s slightly sweeter and lacks the distinct mustard and garlic notes of Big Mac Sauce. For a closer match, you can mix Thousand Island dressing with a bit of yellow mustard and a pinch of garlic powder.
3. What are the 7 ingredients in a Big Mac?
The Big Mac is more than just its sauce. Here are the 7 key ingredients that make up this iconic burger:
- Two Beef Patties: The foundation of the Big Mac.
- Big Mac Sauce: The star of the show.
- Shredded Lettuce: Adds a fresh crunch.
- American Cheese: Melts perfectly over the patties.
- Pickles: For a tangy bite.
- Diced Onions: Adds a subtle sharpness.
- Sesame Seed Bun: The iconic three-layer bun holds it all together.

4. How do you make your own Big Mac?
Recreating a Big Mac at home is easier than you think! Here’s how to make your own version:
Ingredients:
- 2 beef patties
- 1 sesame seed bun (or 3 slices for the classic triple-layer)
- 1 slice American cheese
- Shredded lettuce
- Diced onions
- Sliced pickles
- Homemade Big Mac Sauce (recipe below)
For the Big Mac Sauce:
- ½ cup mayonnaise
- 2 tbsp sweet pickle relish
- 1 tsp yellow mustard
- 1 tsp white vinegar
- 1 tsp garlic powder
- 1 tsp onion powder
- 1 tsp paprika
- 1 tsp sugar or honey
Instructions:
- Make the Sauce: Mix all the sauce ingredients in a bowl until smooth. Adjust seasoning to taste.
- Cook the Patties: Season beef patties with salt and pepper, then cook on a skillet or grill until done.
- Assemble the Burger: Toast the sesame seed bun. Spread Big Mac Sauce on the bottom bun, then layer with lettuce, cheese, beef patty, pickles, onions, and the middle bun. Repeat for the second patty and top with the final bun.
- Serve and Enjoy: Serve immediately with fries for the full Big Mac experience!
5. Tips for Perfect Homemade Big Mac Sauce
- Use Quality Ingredients: Fresh mayonnaise and high-quality spices make a big difference.
- Adjust to Taste: Add more mustard for tanginess or sugar for sweetness.
- Let It Rest: Allow the sauce to sit in the fridge for 30 minutes to let the flavors meld.
6. Why Make Big Mac Sauce at Home?
- Healthier Option: Control the ingredients and avoid preservatives.
- Customizable: Adjust the flavor to your liking.
- Cost-Effective: Save money by making it at home.
7. Fun Facts About Big Mac Sauce
- Global Love: Big Mac Sauce is loved worldwide and has inspired countless copycat recipes.
- Secret Recipe: McDonald’s has kept the exact recipe a secret for decades.
- Versatile Use: Use it as a dip for fries, a salad dressing, or a sandwich spread.
8. Frequently Asked Questions (FAQs)
- Can I make Big Mac Sauce ahead of time? Yes, it can be stored in the fridge for up to a week.
- Is Big Mac Sauce gluten-free? Yes, if you use gluten-free ingredients.
- Can I make it vegan? Substitute vegan mayonnaise and sugar for a plant-based version.
9. Why You’ll Love This Recipe
- Iconic Flavor: Recreate the taste of a Big Mac at home.
- Customizable: Adjust the sauce and toppings to your liking.
- Fun to Make: Perfect for a DIY burger night with family or friends.
Conclusion
Big Mac Sauce is the secret behind one of the world’s most beloved burgers. Now that you know what’s in it, the closest store-bought alternatives, and how to make your own Big Mac at home, you can enjoy this iconic flavor anytime. Give it a try and let us know how it turns out!
Sustainable Cooking
Cool Whip Fruit Salad: A Creamy, Fruity Delight for Every Occasion
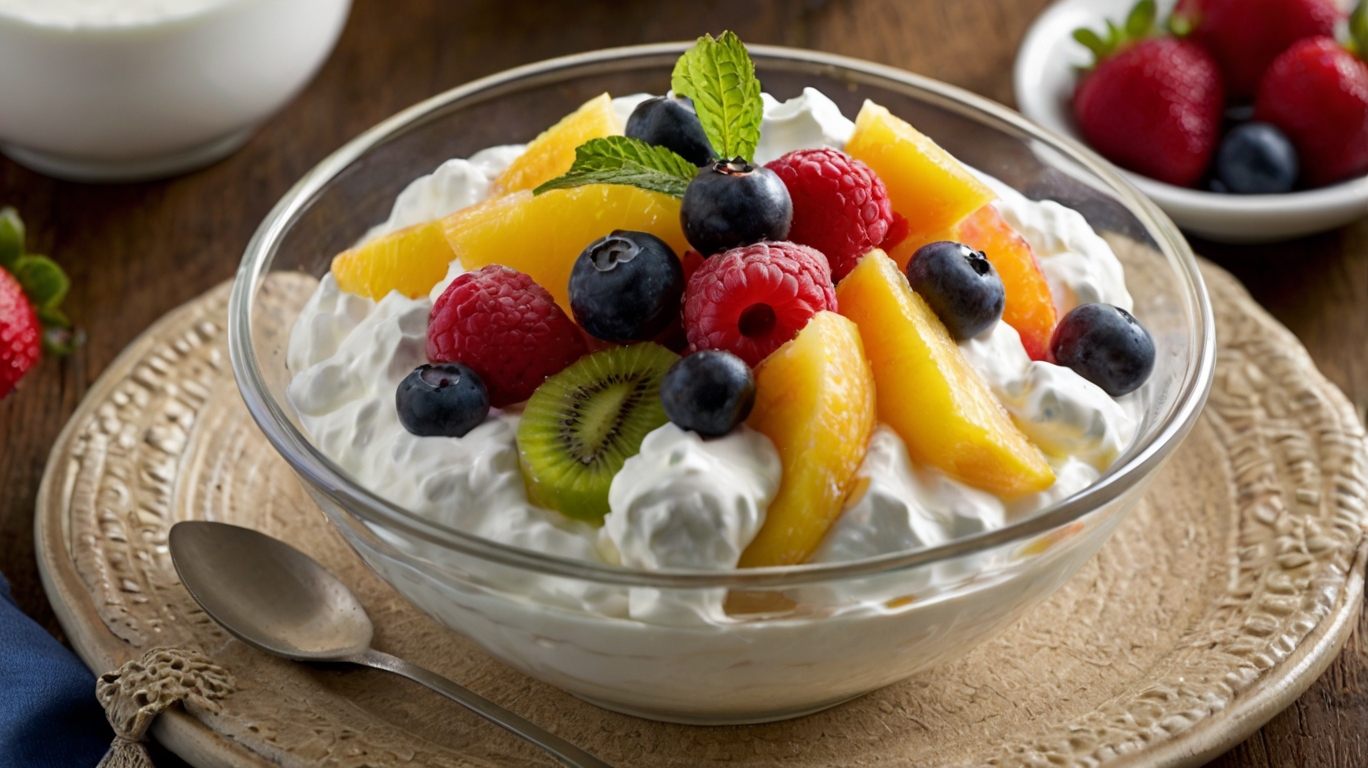
Fruit salads are a timeless dessert or side dish, offering a refreshing blend of flavors and textures. When combined with Cool Whip and a touch of instant vanilla pudding, this simple recipe transforms into a creamy, fluffy treat that everyone loves. Whether you’re preparing for a casual family dinner or a festive gathering, Cool Whip fruit salad is an easy-to-make dish that feels indulgent but is packed with fresh fruit flavors.
In this article, we’ll explore everything you need to know about making the best Cool Whip fruit salad, tips for achieving the perfect texture, variations to suit your taste, and how to serve it for any occasion.
What Is Cool Whip Fruit Salad?
Cool Whip fruit salad is a light and creamy dessert salad made with a mix of canned and fresh fruits, mini marshmallows, instant vanilla pudding, and whipped topping. Unlike traditional fruit salads, this version has a rich, fluffy texture and a touch of sweetness that pairs perfectly with the natural tang of the fruit.
This dish, often referred to as “fluff salad,” is versatile, customizable, and beloved by children and adults alike. Its creamy consistency and vibrant flavors make it a standout at potlucks, BBQs, and holiday dinners.
Ingredients for the Perfect Cool Whip Fruit Salad
To achieve the perfect balance of sweetness, creaminess, and freshness, here’s what you’ll need:
- Pineapple Tidbits (Canned): These add a tropical sweetness to the salad. The juice is also used to blend with the pudding mix for added flavor.
- Instant Vanilla Pudding: This is the secret ingredient that thickens the salad and enhances its creamy texture.
- Fruit Cocktail (Canned): A mix of pears, grapes, peaches, and cherries offers a variety of textures and tastes.
- Mandarin Oranges (Canned): Their delicate sweetness and juiciness add a delightful burst of flavor.
- Fresh Strawberries: Adds a pop of color and a balance of tartness to the salad.
- Maraschino Cherries: Stemless cherries are convenient and add vibrant color.
- Mini White Marshmallows: These give the salad its signature fluffiness.
- Cool Whip: The base that ties all the ingredients together. Any whipped topping brand will work, but Cool Whip is preferred for its stability.
How to Make Cool Whip Fruit Salad
This fruit salad is incredibly easy to prepare, making it a go-to for busy schedules. Here’s a step-by-step guide:
Step 1: Drain the Fruit
- Drain the juice from the canned pineapple into a large mixing bowl. Set aside the pineapple tidbits.
- Drain the fruit cocktail and mandarin oranges thoroughly to prevent the salad from becoming watery.
Step 2: Mix the Pudding
- Add the instant vanilla pudding to the reserved pineapple juice and whisk until smooth and creamy. This will form the base of your salad.
Step 3: Combine Fruits
- Add the drained pineapple tidbits, fruit cocktail, mandarin oranges, fresh strawberries, and halved maraschino cherries into the pudding mixture. Gently stir to coat all the fruit evenly.
Step 4: Add Marshmallows
- Mix in the mini marshmallows, ensuring they are evenly distributed throughout the salad.
Step 5: Fold in the Cool Whip
- Gently fold the Cool Whip into the fruit mixture using a rubber spatula. Be careful not to overmix, as this can break down the Cool Whip and fruit.
Step 6: Chill and Serve
- Cover the bowl with plastic wrap and refrigerate the salad for at least 1 hour before serving. Chilling helps the flavors meld together and gives the salad its signature creamy texture.
Tips for Making the Best Cool Whip Fruit Salad
- Use Fresh Strawberries: Fresh strawberries elevate the flavor and provide a vibrant, juicy texture. Opt for ripe strawberries for maximum sweetness.
- Chill the Cool Whip: Keeping the Cool Whip cold before mixing ensures the salad stays fluffy and doesn’t deflate.
- Drain Fruit Thoroughly: Excess juice from the canned fruits can make the salad watery, so draining them well is crucial.
- Use a Gentle Folding Motion: When combining the Cool Whip, use a light hand to maintain the salad’s fluffy texture.
Variations and Substitutions
This recipe is easily adaptable to suit different tastes and dietary preferences:
- Dairy-Free Option: Use a coconut-based whipped topping and ensure the pudding mix is dairy-free. The coconut flavor complements the fruit beautifully.
- Fresh Fruit Additions: Include fresh fruits like blueberries, kiwi, mango, raspberries, or bananas for extra freshness and flavor.
- Add Crunch: Mix in chopped nuts such as walnuts, almonds, or pistachios for added texture.
- Colorful Marshmallows: Swap plain marshmallows for fruit-flavored ones to give the salad a fun, ambrosia-like twist.
- Extra Sweetness: Add a tablespoon of maraschino cherry juice to the salad for a pop of color and a subtle cherry flavor.
Serving Suggestions
Cool Whip fruit salad pairs well with a variety of dishes:
- BBQ Favorites: Serve alongside grilled chicken, burgers, or ribs for a refreshing contrast.
- Brunch: Pair with pancakes, waffles, or muffins for a sweet and fruity side dish.
- Dessert Spread: Add it to a dessert table with Jello salad, cakes, or pies.
For a simple presentation, garnish the salad with a dollop of whipped cream and a cherry on top.
Storage and Shelf Life
Cool Whip fruit salad can be prepared ahead of time, making it a convenient dish for parties and gatherings. Store it in an airtight container in the refrigerator for up to 3–4 days. However, for the best texture and flavor, serve it within 24 hours.
FAQs About Cool Whip Fruit Salad
Can I Use Whipped Cream Instead of Cool Whip?
Cool Whip is stabilized, making it ideal for this recipe. Whipped cream tends to deflate quickly, resulting in a runny salad.
Can I Make It Ahead of Time?
Yes! Preparing the salad a day in advance allows the flavors to blend beautifully. Just ensure it’s stored in the refrigerator.
What Is the Difference Between Fluff Salad and Ambrosia Salad?
Ambrosia salad often includes fruit-flavored marshmallows and shredded coconut, whereas this fluff salad sticks to plain marshmallows and focuses on the creamy, fruit-filled base.
Conclusion
Cool Whip fruit salad is a crowd-pleaser that combines the natural sweetness of fruit with the creaminess of whipped topping and pudding. Its versatility, simplicity, and vibrant flavors make it an excellent addition to any meal, whether as a side dish or dessert. With just a handful of ingredients and minimal effort, you can whip up a salad that’s sure to impress friends and family alike.
Ready to elevate your next gathering? Try this Cool Whip fruit salad, and watch it disappear in no time!
fallow my page / Pinterest
-
 Uncategorized3 months ago
The Ultimate Buffalo Chicken Dip Recipe
-

 Sustainable Cooking3 months ago
Big Mac Sauce: Secrets, Ingredients and How to Make It at Home
-
 Sustainable Cooking3 months ago
Moist Banana Bread Recipe with Oil and Brown Sugar The Perfect Treat
-

 World Cuisines5 months ago
Thai Basil Eggplant Recipe: A Flavorful Vegan and Gluten-Free Delight
-

 Sustainable Cooking5 months ago
Spicy Korean Chicken and Rice Recipe: A Flavor-Packed Comfort Meal
-
 World Cuisines4 months ago
How to Make Freddy’s French Fry Sauce: The Ultimate Copycat Recipe
-
 World Cuisines8 months ago
Spaghetti Salad with Salad Supreme: A Flavor-Packed Side Dish
-

 Sustainable Cooking5 months ago
Grilled Olives: The Ultimate Crowd-Pleasing Appetizer
