
World Cuisines
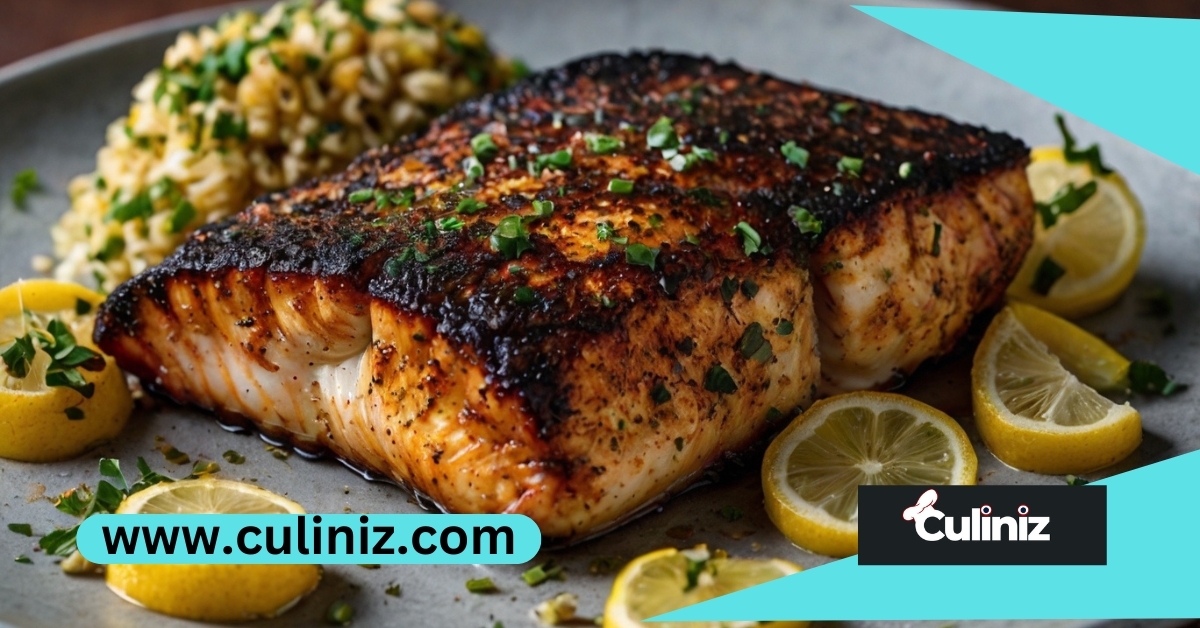
The Ultimate Guide to Blackened Grilled Lingcod Recipes
Are you looking to elevate your grilling game with bold flavors? Blackened grilled lingcod is a show-stopping dish that combines the perfect amount of spice with the smoky, charred taste of the grill. This guide walks you through every step, from seasoning to grilling, plus expert tips to make this recipe a hit. Whether you’re new to grilling or an experienced chef, read on to learn how to prepare a mouth-watering blackened lingcod that’s perfect for any occasion.
What is Blackened Grilled Lingcod?
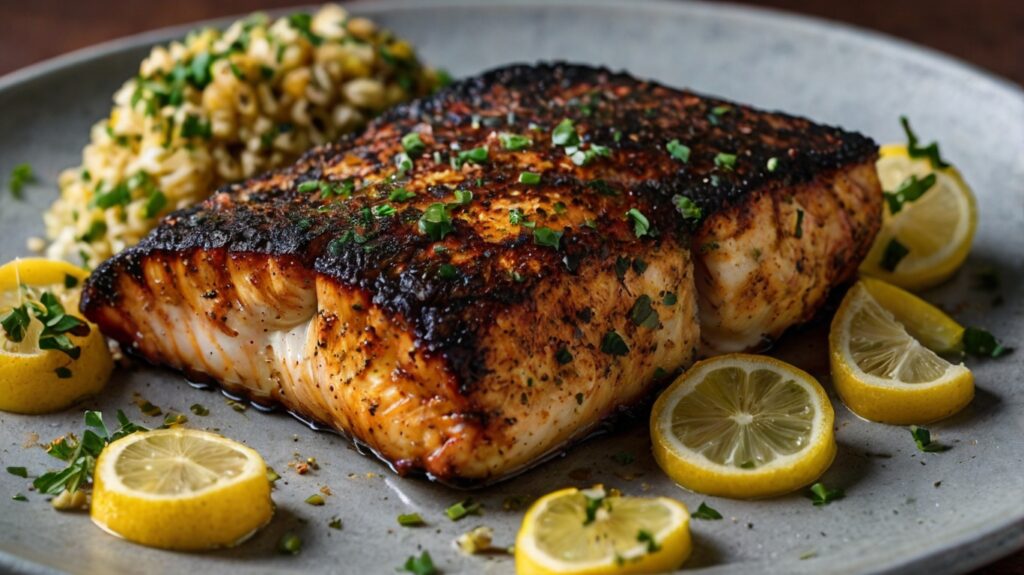
Blackened grilled lingcod is a flavorful twist on classic grilled seafood. It features lingcod coated in a spiced, blackened crust. Blackening is a cooking technique that typically involves covering the fish in a blend of spices and cooking it over high heat. This creates a smoky, slightly charred crust while keeping the inside moist and tender.
With its mild taste and firm texture, Lingcod is an ideal fish for grilling and blackening. Its dense flesh holds up to high heat, allowing the spices to seep in while retaining a soft, flaky texture. Plus, lingcod is packed with protein and omega-3 fatty acids and is low in calories, making it a nutritious addition to any diet.
Ingredients for Blackened Grilled Lingcod
For a rich and flavorful blackened lingcod, gather these ingredients:
- Lingcod: For grilling, use fresh lingcod fillets or steaks, ideally 1-1.5 inches thick. Thicker fillets hold better on the grill and give a tender, juicy texture.
- Blackening Spice Mix: A classic blend that includes smoked paprika, cayenne, thyme, oregano, garlic powder, onion powder, salt, and black pepper. Adjust cayenne for spice level.
- Oil or Butter: This helps the spices adhere and creates a rich crust as the fish cooks. Avocado or olive oil works well for grilling.
- Optional Flavor Additions: Lemon zest or fresh herbs (such as parsley or cilantro) can enhance the blackened flavor, especially when sprinkled on the fish before grilling.
Step-by-Step Instructions: Blackened Lingcod on the Grill
Follow these steps for perfect blackened grilled lingcod:
- Preparation Tips: Start by rinsing the lingcod fillets under cold water and patting them dry. This removes excess moisture, allowing the spice mix to adhere better.
- Make the Blackened Spice Rub: In a small bowl, combine smoked paprika, cayenne pepper (to taste), dried thyme, dried oregano, garlic powder, onion powder, salt, and black pepper. Mix well, then taste and adjust as needed.
- Coat the Lingcod: Brush both sides of the fillets with a thin layer of oil or melted butter. Then, coat each side with the blackened spice mix, pressing lightly so the spices stick.
- Preheat the Grill: Heat the grill to medium-high (about 400°F). Lightly oil the grates to prevent sticking. If you’re using a grill pan, heat it on the grill or stovetop until very hot.
- Grill the Lingcod: Place the fillets on the grill and cook for 3-5 minutes per side, depending on thickness. Avoid moving the fish too much for a rich blackened crust—let it cook undisturbed. Flip gently using a fish spatula.
- Check for Doneness: Lingcod is done when it reaches an internal temperature of 145°F or when the flesh is opaque and flakes easily with a fork. Avoid overcooking for the best texture.
Tips for Perfectly Blackened Grilled Lingcod
To achieve a perfectly blackened, restaurant-quality lingcod, keep these tips in mind:
- Use High Heat: The grill should be hot enough to create a char outside without burning the spices.
- Prevent Sticking: Brush the grill grates with oil and ensure the fish is coated well. Avoid moving the fish during cooking to prevent it from sticking.
- Adjust Spice Levels: Reduce the amount of cayenne in the spice mix for a milder dish. Add a pinch of chili powder or more cayenne for an extra kick.
- Handle Lingcod Carefully: Since Lingcod can be delicate, flip it only once to maintain its shape and texture.
Serving Suggestions for Blackened Grilled Lingcod
A delicious blackened lingcod can complement fresh, light side dishes and vibrant sauces. Here are a few pairing ideas:
- Side Dishes: Grilled vegetables (like zucchini, bell peppers, or asparagus), wild rice, or a crisp green salad are perfect accompaniments.
- Sauces and Garnishes: A tangy lemon garlic aioli or a zesty mango salsa adds flavor. Garnish with fresh herbs and lemon wedges to enhance the presentation and flavor.
- Presentation Tips: Arrange grilled vegetables and drizzle sauces artistically around the fillet for a visually appealing plate. A few sprigs of parsley or cilantro can add a touch of color.
Storing and Reheating Tips
If you have leftovers, follow these steps to keep your blackened lingcod fresh and tasty:
- Refrigerating: Store leftover fish in an airtight container in the fridge for up to 3 days. Keep it covered to retain moisture.
- Reheating: Warm the fish in a low-temperature oven (325°F) for about 10 minutes, or use an air fryer for a crispy texture. Avoid microwaving, as it can dry out the fish.
- Freezing: If you want to store the fish longer, freeze individual portions wrapped in plastic and place them in a freezer-safe bag. Defrost in the fridge before reheating.
Conclusion
Blackened grilled lingcod combines bold flavors with a satisfying smoky char, making it a perfect choice for seafood lovers. You can enjoy this flavorful dish at home with just a few simple ingredients and some easy grilling tips. Pair it with fresh sides, add a delicious sauce, and savor the restaurant-quality results from your grill. Try this recipe today, and don’t forget to experiment with different spice levels and pairings to make it uniquely yours!
Frequently Asked Questions
Can I use frozen lingcod for this recipe?
Yes, frozen lingcod works well. Just be sure to thaw it entirely in the fridge and pat it dry before seasoning and grilling.
What’s the difference between blackened and grilled lingcod?
Blackened lingcod is coated in a spiced crust that chars during grilling, while grilled lingcod is cooked on the grill without spices. Blackening creates a distinct smoky, spicy crust.
Can I use the blackening technique on other types of fish?
Absolutely! Blackening works well with firm fish like salmon, halibut, and red snapper. Just adjust cooking times based on thickness.
How do I keep the lingcod moist while grilling?
Oil or melted butter helps seal in moisture, and grilling at a high temperature temporarily prevents drying out.
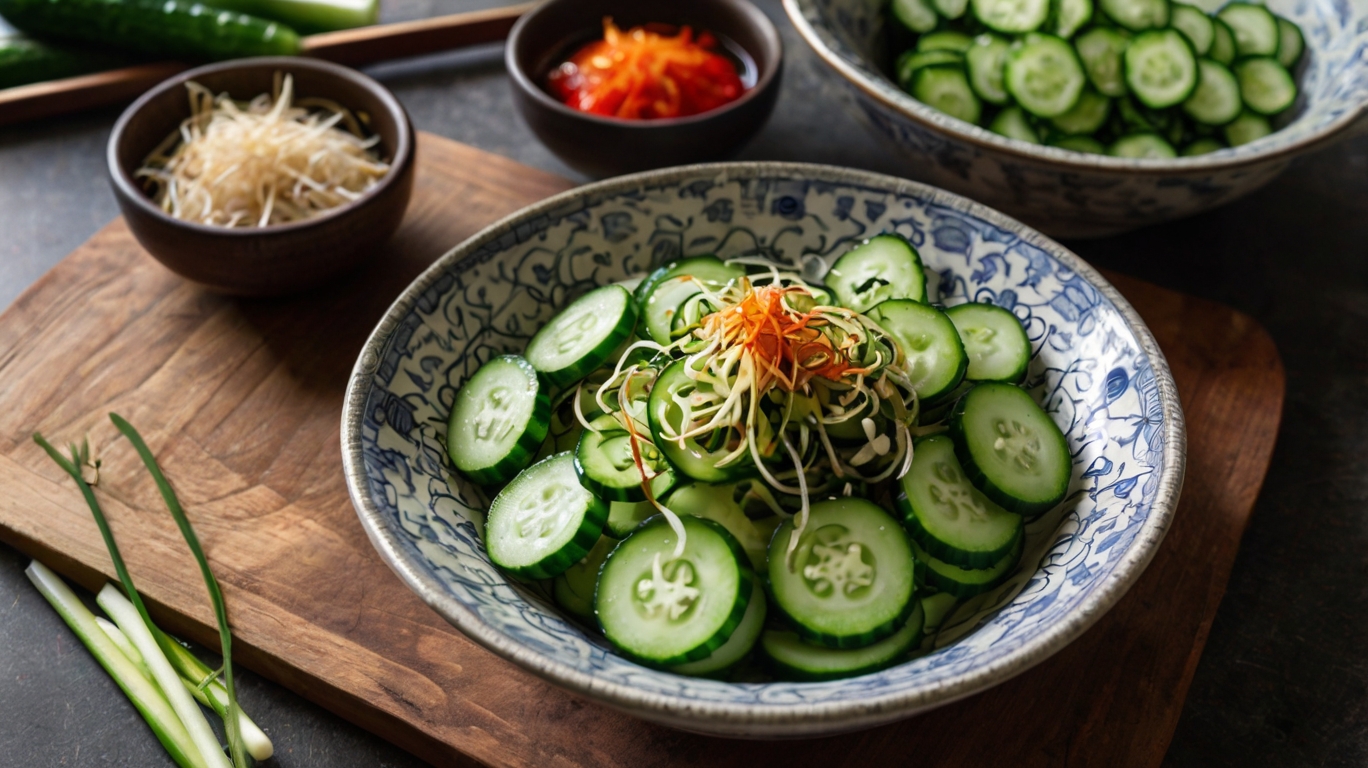
If you’re looking for a quick, flavorful, and healthy side dish, Korean Cucumber Salad (Oi Muchim) is the answer. This vibrant salad is a staple in Korean cuisine, known for its refreshing crunch and spicy-tangy flavor. Best of all, it’s ready in just 10 minutes! Whether you’re serving it alongside Korean BBQ, rice bowls, or enjoying it as a light snack, this salad is sure to impress. Let’s dive into the recipe and tips to make it perfect every time.
What is Korean Cucumber Salad?
Oi Muchim is a simple yet delicious salad made with crisp cucumbers, garlic, green onions, and a flavorful seasoning of soy sauce, gochugaru (Korean red pepper flakes), and sesame oil. It’s light, refreshing, and pairs perfectly with grilled meats, rice dishes, or even as a snack. The combination of spicy, tangy, and slightly sweet flavors makes it a crowd-pleaser.
Ingredients
- 2 medium cucumbers (English or Persian)
- 2 cloves garlic, minced
- 2 green onions, thinly sliced
- 1 tbsp soy sauce (or tamari for gluten-free)
- 1 tbsp gochugaru (adjust to taste)
- 1 tbsp rice vinegar
- 1 tsp sesame oil
- 1 tsp sugar or honey
- 1 tsp toasted sesame seeds (optional)
Step-by-Step Instructions
- Prepare the Cucumbers: Wash and thinly slice the cucumbers. For extra crunch, leave the skin on. If using larger cucumbers, cut them in half lengthwise and scoop out the seeds to prevent excess water.
- Make the Dressing: In a small bowl, mix together the minced garlic, soy sauce, gochugaru, rice vinegar, sesame oil, and sugar. Adjust the spice level by adding more or less gochugaru.
- Combine and Toss: Place the sliced cucumbers in a large bowl. Add the dressing and sliced green onions. Toss everything together until the cucumbers are evenly coated.
- Serve and Enjoy: Transfer the salad to a serving dish and sprinkle with toasted sesame seeds for added flavor and texture. Serve immediately or chill in the fridge for 30 minutes for a cooler, refreshing taste.
Tips for the Perfect Korean Cucumber Salad
- Cucumber Choice: Use fresh, firm cucumbers like English or Persian varieties. They have fewer seeds and thinner skin, making them ideal for this salad.
- Spice Level: Adjust the gochugaru to suit your taste. If you’re new to Korean spices, start with ½ tbsp and add more as needed.
- Make Ahead: While this salad is best enjoyed fresh, you can store it in the fridge for up to 24 hours. Drain any excess liquid before serving.
- Add-Ins: Feel free to add shredded carrots, radishes, or even a splash of lime juice for extra flavor and color.
Why You’ll Love This Recipe
- Quick and Easy: Ready in just 10 minutes, it’s perfect for busy weeknights or last-minute meals.
- Healthy and Refreshing: Low in calories and packed with flavor, it’s a guilt-free side dish.
- Versatile: Pairs well with Korean BBQ, rice bowls, or as a light snack.
Conclusion
Korean Cucumber Salad (Oi Muchim) is a must-try for anyone who loves bold, refreshing flavors. With its simple ingredients and quick preparation, it’s the perfect side dish to brighten up any meal. Give this recipe a try, and let us know how it turns out in the comments below

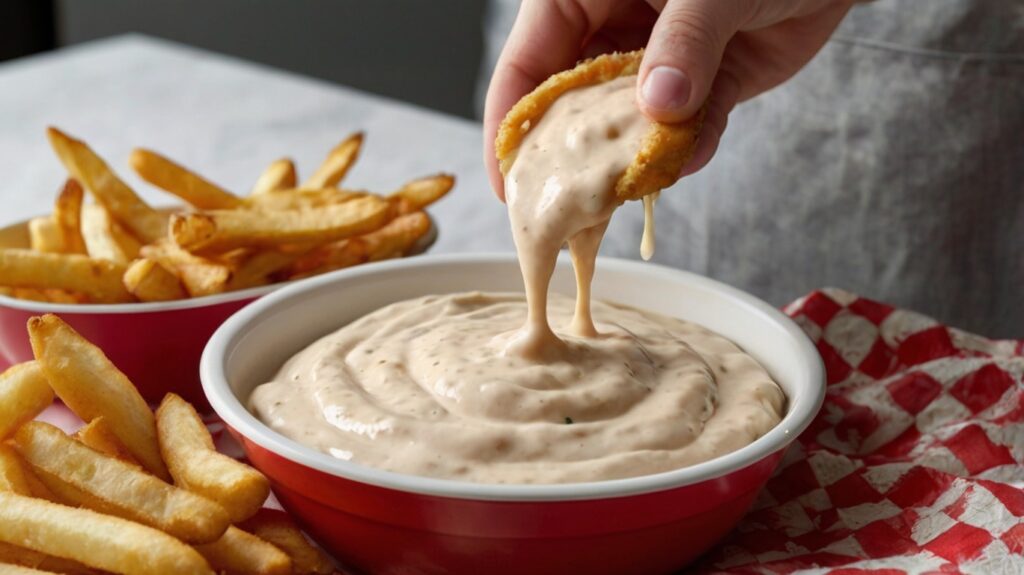
If you’ve ever dined at Freddy’s Frozen Custard & Steakburgers, you know their French fry sauce is legendary. That creamy, tangy, and slightly sweet dip is the perfect accompaniment to their crispy shoestring fries. But what if you could recreate that iconic Freddy’s French fry sauce recipe at home? Good news—you can! In this detailed guide, we’ll walk you through everything you need to know to make this delicious sauce in your own kitchen. Plus, we’ll share tips, tricks, and creative ways to use this versatile sauce.
What Makes Freddy’s French Fry Sauce So Special?
Freddy’s French fry sauce has a cult following for a reason. It’s a unique blend of creamy, tangy, and slightly sweet flavors that perfectly complements their golden, crispy fries. While the exact recipe is a closely guarded secret, we’ve cracked the code to create a homemade version that’s just as delicious. The key lies in the balance of ingredients—creamy mayonnaise, tangy ketchup, a hint of sweetness, and a secret ingredient that ties it all together.
Why Make Freddy’s French Fry Sauce at Home?
- Save Money: Dining out just for the sauce can add up. Making it at home is cost-effective and allows you to enjoy it whenever you want.
- Customize It: Adjust the ingredients to suit your taste preferences—add more spice, sweetness, or tanginess as you like.
- Impress Your Guests: Serve this sauce at your next gathering, and watch it disappear! It’s a guaranteed crowd-pleaser.
- Endless Uses: It’s not just for fries! Use it as a dip for burgers, chicken tenders, onion rings, or even veggies.
Freddy’s French Fry Sauce Recipe
Here’s the step-by-step guide to making Freddy’s French fry sauce at home. This recipe makes about 1 cup of sauce, but you can easily double or triple it for larger gatherings.
Ingredients:
- ½ cup mayonnaise (use high-quality mayo for the best flavor)
- 2 tablespoons ketchup
- 1 tablespoon distilled white vinegar
- 1 teaspoon sugar
- 1 teaspoon paprika
- ½ teaspoon garlic powder
- ½ teaspoon onion powder
- ¼ teaspoon salt
- ¼ teaspoon black pepper
- 2-3 tablespoons pickle juice (this is the secret ingredient!)
Instructions:
- Combine the Base Ingredients: In a medium-sized bowl, add the mayonnaise, ketchup, and white vinegar. Mix until smooth and well combined.
- Add the Spices: Stir in the sugar, paprika, garlic powder, onion powder, salt, and black pepper. Mix well to ensure the spices are evenly distributed.
- Incorporate the Secret Ingredient: Add the pickle juice, one tablespoon at a time, until you reach your desired consistency and flavor. The pickle juice adds a tangy kick that mimics the original Freddy’s sauce.
- Chill and Serve: Cover the bowl and refrigerate the sauce for at least 30 minutes to allow the flavors to meld. Serve with your favorite fries, burgers, or snacks.
Tips for Perfect Freddy’s French Fry Sauce
- Use High-Quality Ingredients: Since this sauce has a short ingredient list, the quality of each component matters. Opt for full-fat mayonnaise and fresh spices for the best flavor.
- Adjust the Sweetness: If you prefer a sweeter sauce, add an extra teaspoon of sugar. For a tangier flavor, increase the amount of pickle juice or vinegar.
- Experiment with Spices: Feel free to tweak the spice levels to suit your taste. A dash of cayenne pepper can add a subtle heat, while smoked paprika can give it a deeper, smoky flavor.
- Make It Ahead of Time: This sauce tastes even better the next day, so consider making it a day in advance to allow the flavors to fully develop.
- Storage Tips: Store the sauce in an airtight container in the refrigerator for up to 1 week. Stir well before serving if the ingredients have separated.
How to Serve Freddy’s French Fry Sauce
While this sauce is a natural pairing for fries, its versatility makes it a great addition to many dishes. Here are some creative ways to use it:
1. Classic French Fry Dip
Pair it with crispy shoestring fries, steak fries, or sweet potato fries for the ultimate dipping experience.
2. Burger Spread
Slather it on your homemade burgers for an extra burst of flavor. It pairs perfectly with beef, chicken, or veggie burgers.
3. Chicken Dip
Use it as a dipping sauce for chicken tenders, nuggets, or even fried chicken sandwiches.
4. Veggie Dip
Pair it with fresh veggies like carrots, celery, bell peppers, or cucumber slices for a healthier snack option.
5. Sandwich Sauce
Add it to sandwiches or wraps for a creamy, tangy twist. It works especially well with turkey, ham, or grilled cheese sandwiches.
6. Onion Ring Dip
Elevate your onion rings by serving them with this flavorful sauce.
7. Breakfast Companion
Try it as a dip for hash browns or breakfast potatoes for a delicious morning treat.
Frequently Asked Questions (FAQs)
1. Can I make this sauce healthier?
Yes! You can use light mayonnaise or Greek yogurt as a substitute for regular mayo. However, keep in mind that this may slightly alter the flavor and texture.
2. How long does Freddy’s French fry sauce last?
When stored in an airtight container in the refrigerator, the sauce will stay fresh for up to 1 week.
3. Can I freeze the sauce?
Freezing is not recommended, as mayonnaise-based sauces tend to separate and lose their creamy texture when thawed.
4. What if I don’t have pickle juice?
If you don’t have pickle juice, you can substitute it with a combination of white vinegar and a pinch of salt. However, pickle juice adds a unique tanginess that’s hard to replicate.
5. Can I make this sauce spicy?
Absolutely! Add a dash of hot sauce, cayenne pepper, or chili powder to give it a spicy kick.
The History of Freddy’s Frozen Custard & Steakburgers
Freddy’s Frozen Custard & Steakburgers was founded in 2002 in Wichita, Kansas, by brothers Bill and Randy Simon, along with their business partner, Scott Redler. The restaurant was named after their father, Freddy Simon, who inspired their commitment to quality and hospitality. Freddy’s is known for its cooked-to-order steakburgers, crispy shoestring fries, and, of course, its famous French fry sauce. The sauce has become a signature item, beloved by customers across the country.
Why You’ll Love This Recipe
This Freddy’s French fry sauce recipe is quick, easy, and requires no special cooking skills. With just a few pantry staples, you can recreate the magic of Freddy’s signature sauce in your own kitchen. Plus, it’s a fun way to bring a taste of your favorite restaurant home. Whether you’re hosting a party, enjoying a family dinner, or simply craving a delicious dip, this sauce is sure to impress.
Final Thoughts
Freddy’s French fry sauce is more than just a condiment—it’s a flavor experience that elevates any meal. With this homemade recipe, you can enjoy that iconic taste anytime, anywhere. Whether you’re dipping fries, spreading it on a burger, or pairing it with veggies, this sauce is a versatile and delicious addition to your culinary repertoire.
So, what are you waiting for? Grab your ingredients and whip up a batch of Freddy’s French fry sauce today. Your taste buds will thank you!
fallow my page also CulinizCooking
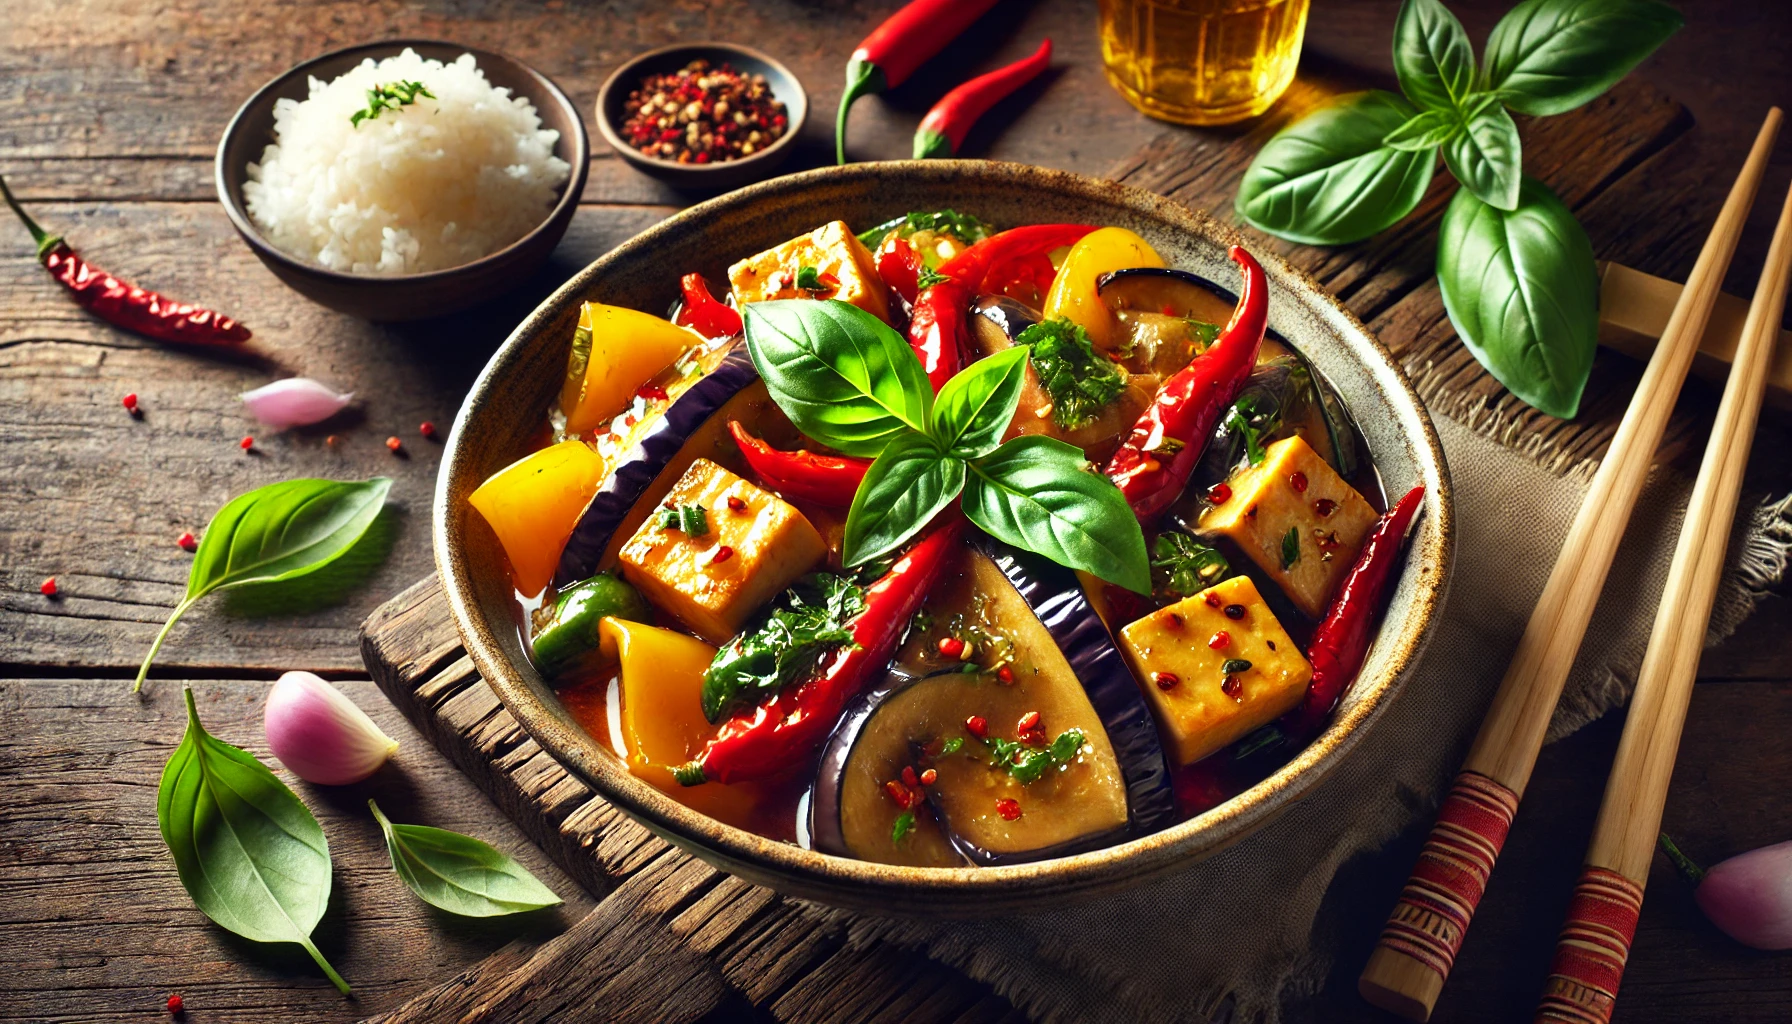
Thai cuisine has captivated food enthusiasts worldwide with its dynamic interplay of bold flavors and wholesome ingredients. The Thai Basil Eggplant recipe is no exception, offering a delightful blend of sweet, savory, and slightly spicy flavors. Whether you’re new to Thai cooking or a seasoned enthusiast, this dish is a must-try for its simplicity and vibrant taste. Here’s a comprehensive guide to preparing this delicious and healthy dish.
Why You’ll Love This Recipe
- Healthy and Nutritious: Packed with vegetables, tofu, and aromatic basil, this dish is a powerhouse of nutrients.
- Vegan and Gluten-Free: With simple ingredient swaps, it caters to diverse dietary preferences.
- Easy to Make: A quick preparation process makes it ideal for busy weeknights or lazy weekends.
Ingredients
For the Main Dish:
- 1 large Italian eggplant or 2 medium Japanese/Chinese eggplants
- 1 green bell pepper, thinly sliced
- 1 red bell pepper, thinly sliced
- 1 yellow bell pepper, thinly sliced
- 1 white onion, halved and thinly sliced
- 14 oz firm tofu, cut into cubes
- 2 cloves garlic, minced
- 4 tbsp cooking oil (coconut, grapeseed, or avocado oil)
- Fresh basil leaves
For the Sauce:
- 4.5 tbsp hoisin sauce (e.g., Koon Chun Hoisin Sauce or gluten-free Sun-Luck Hoisin Sauce)
- 1/2 cup tamari or soy sauce
- 1/4 cup water
- 2 tsp chili sauce (e.g., Huy Fong Chili Sauce)
- 2 tsp cornstarch
Step-by-Step Instructions
Preparing the Eggplant:
- Slice the eggplant: If using Italian eggplant, cut it into slabs, then into diagonal pieces. For Japanese/Chinese eggplants, slice lengthwise and cut diagonally.
- Heat 2-3 tablespoons of oil in a large non-stick pan over medium heat.
- Add the eggplant pieces, toss to coat with oil, and cook with a small amount of water over low-medium heat. Cover and stir occasionally until tender but firm. Set aside.
Preparing the Tofu and Vegetables:
- Press the tofu to remove excess moisture, then cut into cubes.
- Pan-fry tofu on medium-high heat until golden brown on most sides. Set aside.
- In the same pan, sauté onions and bell peppers with 1 tbsp oil until crisp-tender. Add minced garlic midway and stir until fragrant.
- Combine cooked tofu, vegetables, and eggplant in one pan.
Making the Sauce:
- Whisk together all sauce ingredients until cornstarch dissolves.
- Heat the combined eggplant, tofu, and vegetables over low-medium heat.
- Pour the sauce into the pan, stirring frequently until it thickens and coats the ingredients evenly.
- Turn off the heat, add freshly chopped basil, and mix well.
Serving Suggestions
Serve the Thai Basil Eggplant hot with:
- Steamed jasmine rice
- Brown rice
- Quinoa for a gluten-free option
Tips for Success
- Choosing the Right Eggplant: Japanese and Chinese eggplants are less bitter and ideal for this dish.
- Adjusting Spice Levels: Add more chili sauce or fresh chilies for extra heat.
- Time-Saving Tips: Cook the tofu and vegetables simultaneously in separate pans while preparing the eggplant.
- Storage: Refrigerate leftovers in an airtight container for up to 3 days. Reheat gently on the stovetop.
Nutritional Information (Per Serving)
- Calories: 185 kcal
- Carbohydrates: 14g
- Protein: 7g
- Fat: 11g
- Sodium: 1382mg
- Fiber: 1g
- Vitamin A: 735 IU
- Vitamin C: 79.4mg
Conclusion
Thai Basil Eggplant is a versatile and delectable dish that embodies the essence of Thai cuisine. With its rich flavors and straightforward preparation, it’s perfect for anyone looking to enjoy a restaurant-quality meal at home. Whether you’re cooking for yourself or hosting a dinner party, this recipe will undoubtedly impress.
Frequently Asked Questions (FAQ)
1. Can I use a different type of eggplant?
Yes, Italian eggplants work well, but Japanese and Chinese varieties are preferred for their tender texture and mild flavor.
2. What can I use instead of tofu?
You can substitute tofu with tempeh, seitan, or even chicken for a non-vegan option.
3. Is this dish spicy?
The dish has a mild spice level. Adjust the chili sauce to suit your preference.
4. Can I prepare this dish in advance?
Yes, you can prepare the components separately and combine them with the sauce just before serving.
5. What can I pair this dish with?
Pair it with other Thai-inspired dishes like Sweet Chili Lime Tofu or a fresh cucumber salad for a complete meal.
Embrace the flavors of Thailand with this easy, healthy, and satisfying recipe. Happy cooking!
fallow my page / Pinterest

The Ultimate Buffalo Chicken Dip Recipe

Moist Banana Bread Recipe with Oil and Brown Sugar The Perfect Treat

Big Mac Sauce: Secrets, Ingredients and How to Make It at Home
The Ultimate Buffalo Chicken Dip Recipe

Spaghetti Salad with Salad Supreme: A Flavor-Packed Side Dish
Big Mac Sauce: Secrets, Ingredients and How to Make It at Home
-
 Uncategorized4 months ago
The Ultimate Buffalo Chicken Dip Recipe
-
 World Cuisines9 months ago
Spaghetti Salad with Salad Supreme: A Flavor-Packed Side Dish
-
 Sustainable Cooking4 months ago
Big Mac Sauce: Secrets, Ingredients and How to Make It at Home
-
 Sustainable Cooking4 months ago
Moist Banana Bread Recipe with Oil and Brown Sugar The Perfect Treat
-

 World Cuisines6 months ago
How to Make Freddy’s French Fry Sauce: The Ultimate Copycat Recipe
-

 Sustainable Cooking6 months ago
Spicy Korean Chicken and Rice Recipe: A Flavor-Packed Comfort Meal
-

 World Cuisines6 months ago
Thai Basil Eggplant Recipe: A Flavorful Vegan and Gluten-Free Delight
-

 Sustainable Cooking6 months ago
Grilled Olives: The Ultimate Crowd-Pleasing Appetizer